


Washing walls may not be the most fun task, but it doesn’t have to take forever. With the right approach, you can make your walls look fresh and clean in no time. Here’s a quick guide to help you wash your walls fast.
Gather Your Supplies
Contents
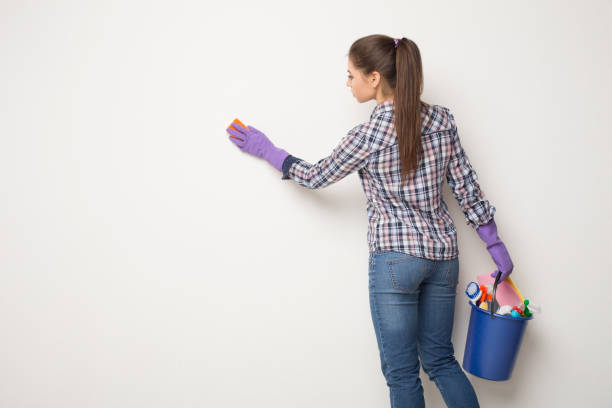
Before you start, make sure you have all the tools you need:
Buckets
You’ll need two buckets:
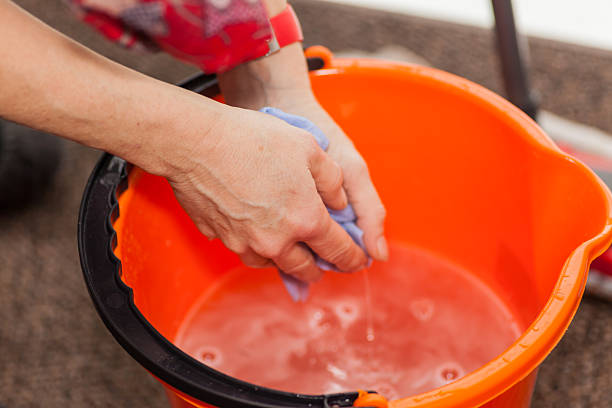
- Clean Water Bucket: This bucket holds clean water for rinsing your sponges or cloths. Changing this water frequently ensures that you aren’t spreading dirt back onto the walls.
- Soapy Water Bucket: Fill this bucket with warm water and a mild detergent. The soapy water helps to loosen dirt and grime from the wall surfaces.
Sponges or Cloths
Choose the right type of cleaning material:
- Soft Sponges: These are great for scrubbing without scratching the paint. Look for sponges that are non-abrasive.
- Microfiber Cloths: These cloths are excellent at picking up dust and dirt. They are also soft on surfaces and can be used for both washing and drying.
Mild Detergent
Pick a detergent that’s tough on dirt but gentle on walls:
- All-Purpose Cleaner: A mild, all-purpose cleaner works well for most wall surfaces.
- DIY Solution: You can also make a homemade cleaning solution using a few drops of dish soap mixed with warm water. Avoid harsh chemicals that might damage your paint.
Step Ladder
A sturdy step ladder is essential:
- Safety First: Make sure the ladder is stable and on a flat surface. A step ladder helps you reach the top corners and high spots on your walls without straining.
- Right Height: Choose a ladder that allows you to comfortably reach the highest points of your walls.
Old Towels
Protect your floors and catch drips:
- Floor Protection: Lay old towels along the base of the walls to absorb any water or cleaning solution that drips down. This keeps your floors dry and prevents slipping.
- Extra Towels: Have a few extra towels on hand to quickly wipe up any spills or to dry your hands.
Additional Supplies
Consider having these extra items for a more efficient cleaning process:
- Spray Bottle: Fill a spray bottle with your soapy solution for quick spot cleaning. This is handy for targeting small areas without soaking your sponge.
- Extendable Mop: For very high walls, an extendable mop with a soft head can save you from climbing up and down the ladder.
- Gloves: Wearing rubber gloves can protect your hands from the cleaning solution, especially if you have sensitive skin.
Prep Your Walls
First, get your walls ready for washing:
Move Furniture
- Clear the Area: Push furniture away from the walls to give yourself ample space to work. This is crucial for ensuring that you can reach every part of your walls without any obstacles.
- Protect Your Furniture: If you can’t move some pieces of furniture, cover them with old sheets or plastic covers to shield them from any splashes or drips while you wash the walls.
Dust the Walls
- Remove Loose Dust: Use a dry cloth or a duster to remove loose dust from the walls. This step is essential because it prevents dust from turning into muddy streaks when you start washing the walls.
- Top to Bottom Approach: Begin dusting from the top of the walls and work your way down. This ensures that any falling dust does not settle on areas of the walls you’ve already cleaned.
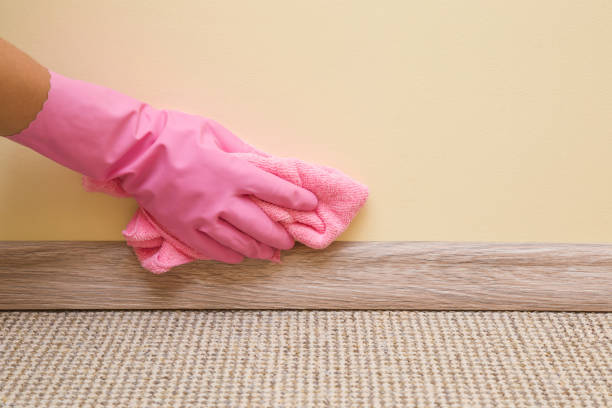
- Pay Attention to Details: Focus on corners, edges, and the tops of baseboards where dust tends to accumulate. A soft brush attachment on a vacuum cleaner can be very effective for reaching these spots on the walls.
Check for Cobwebs and Stains
- Cobwebs: Inspect the upper corners of your walls and ceiling for cobwebs. Remove them using a duster or a broom with soft bristles.
- Identify Stains and Marks: Look for any stains, marks, or fingerprints on the walls. These areas may need special attention. Use a gentle cleaning solution on a cloth to pre-treat these spots before washing the entire wall.
Protect Your Floors
- Floor Protection: Lay old towels or plastic sheeting along the base of the walls to catch any drips or splashes. This helps keep your floors dry and safe from cleaning solutions.
By carefully preparing your walls, you ensure a smoother and more efficient cleaning process. Proper preparation also helps protect your furniture and floors while giving you the best chance at achieving spotless walls. With everything ready, you’re set to start washing your walls quickly and effectively.
Wash in Sections
Washing walls is easier and more effective if you do it in sections. Breaking down the task helps ensure that each part of the wall is thoroughly cleaned without missing any spots. Here’s how to wash your walls in sections for the best results:
Start at the Top
- Begin Washing from the Top of the Wall: Always start at the top of the wall and work your way down. This technique ensures that any dirty water or cleaning solution that drips down will land on areas of the wall that you haven’t cleaned yet, rather than on already cleaned sections.
- High Corners and Ceilings: Use a step ladder to reach the high corners and the top edges of the wall. Pay special attention to these areas, as they often collect more dust and cobwebs.
Use a Circular Motion
- Wipe in Small Circles: Using a circular motion helps lift dirt and grime off the wall more effectively than simply wiping up and down. The circular motion creates friction that loosens stubborn spots without damaging the wall paint.
- Consistent Pressure: Apply consistent, gentle pressure to avoid scrubbing off paint or leaving streaks on the wall. This method is especially important for walls with delicate finishes.
Rinse Often
- Frequent Rinsing: Dip your sponge or cloth into clean water often to rinse out the accumulated dirt and soap. Frequent rinsing prevents spreading dirt around and ensures that each section of the wall gets cleaned with fresh, clean water.
- Change Water Regularly: Regularly change the clean water bucket to maintain its effectiveness. Dirty water can leave streaks and spots on your walls, so keeping your rinsing water fresh is crucial.
Work in Manageable Sections
- Divide the Wall into Sections: Mentally divide the wall into smaller, manageable sections. Focus on one section at a time, ensuring that each part is thoroughly cleaned before moving on to the next.
- Overlap Edges: Slightly overlap the edges of each section as you move along the wall. This technique ensures that no areas are missed and that the entire wall has a uniform clean look.
Use the Right Tools
- Sponges and Cloths: Use soft sponges or microfiber cloths to clean the wall sections. These materials are gentle on the wall paint and effective at picking up dirt.
- Extendable Tools: For high walls, consider using an extendable mop or sponge to reach the upper sections without constantly moving a step ladder.
By following these steps and working in sections, you can efficiently wash your walls without leaving streaks or spots. Starting at the top, using circular motions, rinsing often, and dividing the wall into sections ensures that every part of your wall gets the attention it needs for a thorough clean.
Quick Cleaning Tips

Here are some extra tips to make your wall-washing even faster and more efficient:
Use a Mop
- Reach High Walls Easily: For high walls, a mop with a sponge head can reach those spots without the need for a ladder. This is especially helpful for tall rooms or hard-to-reach areas.
- Extendable Mop: Consider an extendable mop that can adjust to different lengths. This tool allows you to clean the top parts of the walls without straining or risking a fall from a ladder.
Spray Bottle
- Quick Spot Cleaning: Fill a spray bottle with your soapy solution to quickly spray and wipe down sections of the wall. This method is efficient for targeting small, specific areas that need extra attention.
- Even Distribution: Spraying the cleaning solution ensures even distribution across the wall surface, making it easier to clean and rinse off.
Two-Handed Technique
- Soapy Sponge and Clean Cloth: Use one hand with a soapy sponge and the other with a clean cloth to rinse. This technique allows you to wash and rinse simultaneously, saving you from constantly switching back and forth between tools.
- Efficient Cleaning: The two-handed technique speeds up the cleaning process and ensures that each section of the wall is thoroughly cleaned and rinsed before moving on.
Drying the Walls
Don’t forget to dry the walls after washing to prevent streaks and water damage:
Pat Dry
- Use a Clean, Dry Cloth: After washing a section of the wall, use a clean, dry cloth to gently pat the walls dry. This helps absorb any remaining moisture and prevents streaks from forming.
- Soft Materials: Choose soft, absorbent materials like microfiber cloths that can effectively dry the walls without scratching the paint.
Ventilation
- Open Windows: Open windows to allow fresh air to circulate in the room. This natural ventilation helps speed up the drying process and keeps the air fresh.
- Use Fans: Place fans near the walls to increase airflow. This is particularly useful on humid days when natural drying might take longer.
- Dehumidifier: If the room is very humid, consider using a dehumidifier to reduce moisture in the air, helping the walls dry faster and preventing mold growth.
Extra Tips
- Check for Residual Moisture: After drying, check the walls for any remaining moisture, especially in corners and near the baseboards. Use a dry cloth to pat these areas again if necessary.
- Final Inspection: Once the walls are dry, inspect them for any missed spots or streaks. Touch up any areas that need additional cleaning or drying to ensure a flawless finish.
By using these quick cleaning tips, you can make your wall-washing process faster and more efficient. The right tools and techniques, combined with proper drying methods, will leave your walls looking fresh and clean without much hassle.
Final Touches
After the walls are clean, give your room a quick check to ensure everything looks perfect:
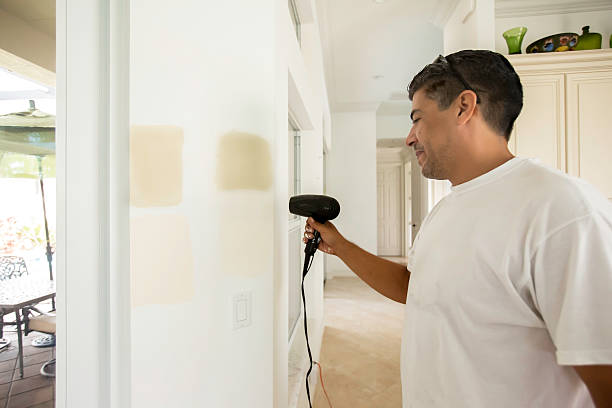
Touch-Up Paint
- Inspect the Walls: Carefully examine the walls for any spots where the paint might have chipped or come off during the cleaning process. Pay special attention to high-traffic areas and corners where wear and tear are more common.
- Prepare the Surface: Before applying touch-up paint, make sure the wall is completely dry. Lightly sand any rough edges around the chipped areas to create a smooth surface for the paint.
- Match the Paint: Use the same color and finish as the original paint on your walls. If you don’t have leftover paint, take a small chip to a paint store to get a perfect match.
- Apply Touch-Up Paint: Use a small brush or a paint pen to apply the touch-up paint. Dab the paint gently onto the chipped areas, blending it seamlessly with the surrounding wall. Allow it to dry completely before assessing if a second coat is needed.
- Check for Uniformity: Once the touch-up paint is dry, step back and check the walls for color uniformity. Make sure the repaired spots blend in well with the rest of the wall.
Rearrange Furniture
- Ensure Walls are Dry: Before moving furniture back, ensure the walls are completely dry. This prevents any damage to the paint or walls from moisture.
- Clean Furniture: Take this opportunity to dust and clean the furniture that was moved. Clean furniture against clean walls enhances the overall freshness of the room.
- Reposition Thoughtfully: As you move furniture back into place, consider rearranging it to improve the room’s layout. A fresh arrangement can make your room feel new and inviting.
- Protect the Walls: When moving furniture back, be careful not to scrape or bump the walls. Use furniture sliders or lift items to prevent marking up the newly cleaned walls.
- Final Adjustments: After placing the furniture, make any final adjustments to decor items like pictures, mirrors, and shelves. Ensure they are properly aligned and spaced to complement the freshly cleaned walls.
By taking these final touches seriously, your walls and room will look their best. Inspecting for paint chips and doing touch-ups ensures the walls are pristine, while thoughtfully rearranging and cleaning furniture completes the room’s refreshed look. Your walls and space will both feel renewed, giving you a sense of accomplishment and a beautiful, clean environment to enjoy.
Conclusion
Washing walls might seem like a daunting task, but with the right approach, it can be quick and effective. By gathering the necessary supplies, prepping your walls, washing in manageable sections, and applying quick cleaning tips, you can achieve spotless, fresh-looking walls in no time. Don’t forget the importance of drying the walls properly and adding those final touches, such as touch-up paint and thoughtful furniture rearrangement, to enhance the overall appearance of your room.
Remember, a little preparation and the right techniques can save you time and effort while ensuring excellent results. Clean walls not only improve the look of your space but also contribute to a healthier living environment. So, roll up your sleeves, follow these steps, and enjoy the satisfaction of beautifully clean walls and a refreshed home.